Share

Friday, May 25, 2012

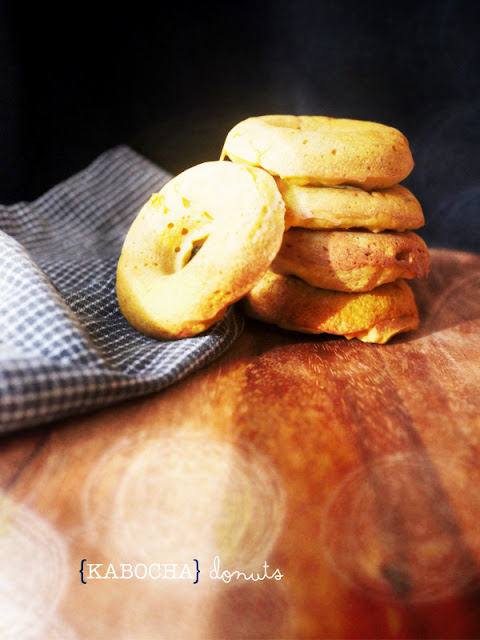
Mmmm Donuts...Kabocha Donuts

I still had some Kabocha left over from making the Gnocchi the other day and after some debate decided to make some donuts...because who doesn't like donuts? ;)


This one is more like a cake donut...except much better for you.  It's not fried, and Kabocha squash takes the main stage with minimal wheat flour (I'd love to experiment this with almond or rice flour) and minimal sweetner.  The coconut oil only adds some healthy fat and voila! A healthy moist snack with just the right amount of sweetness.


Kabocha Donuts


Ingredients:
Fills about 6 regular donut molds

1/4 of Kabocha Squash (peeled)
1/2cup Plain Yogurt
2-3tbsp Sugar or Honey (or any sweetner)
1/4cup virgin coconut oil
1 egg
1/2cup wheat flour
1/2tsp baking powder
pinch of salt

Directions:

1) Preheat oven to 350F.  Spray or butter your Donut molds.

2) Blend coconut oil with the sugar until fluffy.

3) Add the egg and mix until incorporated. Slowly add flour, baking powder, and salt until incorporated- don't over mix!

4) Peel and cut Kabocha squash into small pieces and microwave for about 3-4min or until very soft.  Mash together with the yogurt in a bowl (or you can puree in a food processor). Fold this into the flour mixture with a spatula.

4) Fill your donut molds and bake for about 20min or until the toothpick test comes back clean.


Tuesday, May 22, 2012

A Pasta Primavera: Kabocha Gnocchi


I know that this blog is specifically titled "No Pasta for Penguins",  but I decided to break the rule a bit with this recipe.  We usually don't have pasta, not because there's anything wrong with pasta - I truly believe in the motto "everything in moderation", but it is a high carb food - something cy tries to avoid if he can so that he doesn't have to use as much insulin.  

However, I've been wanting to try making Gnocchi out of the Japanese Kabocha squash for quite sometime now.  It's true that winter squash tend to be a high carb vegetable, but research now reveal that not all carbs are made equal.  Much of the carbs in winter squash come from polysaccharides in cell walls including specially structured ones called pectin.  These components have been found to have anti-inflammatory, anti-oxidant, as well as anti-diabetic and insulin regulating properties.  You can read more about it here or here


This Gnocchi,  made mostly with Kabocha and some wheat flour, is filled with good-for-you carbs, not to mention super simple to make and delicious to eat. It's wonderful on it's own, and I thought about just tossing it in some lemon and sage sauce or something, but decided to make a primavera out of it instead.  The added chicken increases the protein content and different roasted veggies add a wonderful contrast in consistency to the gnocchi, making for a perfect light lunch or dinner.


Kabocha Gnocchi


Ingredients:
makes enough to serve 2-3

Approx 1/4 of medium sized Kabocha
100g of wheat flour
dash of salt

Directions:

1) Peel Kabocha piece, chop into rough pieces and boil until soft.

2) Mix cooked kabocha with the wheat flour in a food processor.  Pulse until combined.  Dough should be sticky but easy to handle.  Try not to overmix the dough.

3) Roll out the dough into tubes approximately 1/2inch in diameter.  Let it rest in the fridge for about an hour.

4) Cut the tubes into pieces 1/2 inch in size.  Roll the the tines of a fork gently across each piece to leave an impression.  When ready to cook, you can cook them in salted boiling water for approximate 7min.  Or you can keep them in a freezer until you're ready to use them.

Primavera

Ingredients:
serves 2-3

1cup Gnocchi (or any other pasta)
1cup cooked chicken breast, chopped (optional)
2 Red bell peppers
1bunch Broccoli
1 carrot
1 onion
1/4cup olive oil
1/4cup grated parmesan
1tbsp chopped garlic
1tbsp Herbs de Provence (or Italian herbs)
salt & pepper

Directions:

1) Preheat oven to 400degreesF.  Thinly slice all vegetables and mix together with salt, pepper, herbs de provence, garlic, and olive oil in a bowl.  Roast on a metal sheet pan for approximately 20 min. Giving it a good mix about half way through.

2) Cook the the Gnocchi during this time, or whatever pasta you plan to use.  Drain, and then toss together with the roasted vegetables.

3)  Add the chicken pieces if you'd like at this point, as well as the parmesan cheese, taste and adjust flavor with salt and pepper and you're done!


Friday, May 11, 2012

Rhubarb Apple & Coconut Crisp


I've been seeing Rhubarb in the markets lately and I couldn't help but reach for some...their bright color feels like the epitome of springtime, and I've always wanted to try making something with them.  I had to do a little bit of research since I had never tasted rhubarb before, and to be honest, I was a little bit nervous about the fact that many of the recipes seemed to use a lot of sugar in order to try to offset the tartness of the rhubarb.


In the end, I decided to try out a simple Crisp.  Mixing it up with some apples allowed me to use a minimal amount of sweetner, and I tried to increase the nutritional value of the "crisp" portion by using coconut oil and shredded coconuts along with some almond flour.  The result was the perfect sweet/tart combination...It made for a delicious breakfast this morning with a little yogurt on the side ;)


Rhubarb Apple & Coconut Crisp

Ingredients:
Fills 4 small ramekins

Filling:
2-3 large stalks Rhubarb
1 Apple ( I used Fuji for this)
4tbsp Honey
1tsp Cinnamon
pinch of Salt

Crisp:
1cup Almond Meal
3/4cup Wheat flour
1/4tsp grated nutmeg
1/4cup nuts (I used almonds, but any kind will work)
1/4cup coconut oil
1/4cup honey
1tbsp vanilla extract
pinch of salt


Directions:

1) Preheat oven to 350F.  Chop rhubarb and apple into small pieces.  Mix together with Honey, Cinnamon and salt in a bowl. Separate evenly in 4 small ramekins.

2) Mix together Almond meal, wheat flour, nuts, salt, and nutmeg in a separate bowl.

3) Melt coconut oil (about 10sec in microwave) and mix with the honey and vanilla extract.  Add to the bowl with the flour and mix until clumps form.

4) Sprinkle the crisp over the filling in each of the ramekins and bake in the oven for about 30-40min, or until brown and crispy and bubbling.  Let cool and enjoy :)


Related Posts Plugin for WordPress, Blogger...

  © Blogger template Shush by Ourblogtemplates.com 2009

Back to TOP